Cisco anyconnect windows 10
Содержание:
- VPN Client Connects to a VPN 3000 Concentrator
- Conclusion and Next Steps after Installation
- Introduction
- Introduction
- Загрузка дистрибутива Cisco VPN Client
- Remote Access VPN Business Scenarios
- Scenario Description
- Поймите, какая у вашего письма цель
- Common Problems
- Похожие приложения
- Контекстное меню
- Настройка Cisco VPN Client и обход ошибок
- What’s new in Cisco AnyConnect 4.8
- Resolved Caveats
- Verify
- Аналогия: каждая ЛВС как остров
- System Requirements
- Предварительные условия
- Параметры настройки
VPN Client Connects to a VPN 3000 Concentrator
When a VPN Client connects to a VPN 3000 Concentrator, up to four authentications can take place.
-
The Group is authenticated. (This is often called the «Tunnel Group.»)
-
The User is authenticated.
-
(Optional) If the User is part of another Group, this Group is authenticated next. If the user does not belong to another Group or the Tunnel Group, then the user defaults to the Base Group and this step does NOT occur.
-
The «Tunnel Group» from Step 1 is authenticated again. (This is done in case the «Group Lock» feature is used. This feature is available in version 2.1 or later.)
This is an example of the events you see in the Event Log for a VPN Client authenticated via the Internal Database ( «testuser» is part of the Group «Engineering»).
Note: To see these Events, you must configure the Auth Event Class with severity 1-6 in Configuration > System > Events > Classes.
Group Lock Feature — If the Group Lock feature is enabled on the Group — Tunnel_Group, then the User must be part of Tunnel_Group to connect. In the previous example, you see all the same Events, but «testuser» does not connect because they are part of the Group — Engineering and not part of the Group — Tunnel_Group. You also see this Event:
For additional information about the Group Lock feature and a sample configuration, refer to Locking Users into a VPN 3000 Concentrator Group Using a RADIUS Server.
Conclusion and Next Steps after Installation
There you have it! You have now successfully installed the Cisco AnyConnect Secure Mobility Client
on your computer.
Wondering what the next steps are? Don’t worry. If you need help configuring AnyConnect on your router, check out Configure AnyConnect VPN Connectivity on the RV34x Series Router.
AnyConnect App
The Anyconnect App can be downloaded from the Google Play store or the Apple store.
Download Android AppDownload
iOS App
Additional Resources
Basic Troubleshooting
Administrator Guide Release 4.8
Release Notes — 4.8
AnyConnect Licensing — RV340
Cisco Business VPN Overview and Best Practices
Introduction
This sample configuration shows how to setup a remote access VPN connection from a Cisco VPN Client to a PIX Firewall, using Advanced Encryption Standard (AES) for encryption. This example uses Cisco Easy VPN to set up the secure channel and the PIX Firewall is configured as an Easy VPN server.
In Cisco Secure PIX Firewall software release 6.3 and later, the new international encryption standard AES is supported for securing site-to-site and remote access VPN connections. This is in addition to the Data Encryption Standard (DES) and 3DES encryption algorithms. The PIX Firewall supports AES key sizes of 128, 192, and 256 bits.
The VPN Client supports AES as an encryption algorithm starting with Cisco VPN Client release 3.6.1. The VPN Client supports key sizes of 128 bits and 256 bits only.
Introduction
This document describes how to allow the Cisco VPN Client or the Cisco AnyConnect Secure Mobility Client to only access their local LAN while tunneled into a Cisco Adaptive Security Appliance (ASA) 5500 Series or the ASA 5500-X Series. This configuration allows Cisco VPN Clients or the Cisco AnyConnect Secure Mobility Client secure access to corporate resources via IPsec, Secure Sockets Layer (SSL), or Internet Key Exchange Version 2 (IKEv2) and still gives the client the ability to carry out activities such as printing where the client is located. If it is permitted, traffic destined for the Internet is still tunneled to the ASA.
Note: This is not a configuration for split tunneling, where the client has unencrypted access to the Internet while connected to the ASA or PIX. Refer to PIX/ASA 7.x: Allow Split Tunneling for VPN Clients on the ASA Configuration Example for information on how to configure split tunneling on the ASA.
Загрузка дистрибутива Cisco VPN Client
Хочется сразу оговориться, что скачать Cisco VPN Client для Windows 10 x64, с официального сайта нет возможности.https://www.cisco.com Дистрибутив доступен лишь по партнерскому договору и только после оплаты. Бесплатная регистрация на портале также не принесет результатов.
В сети очень много предложено инсталляционных пакетов, но загрузка с того или иного портала и последствия для машины – полностью под Вашу ответственность. Что касается Cisco anyconnect VPN Client Windows 7 x64, то абсолютно бесплатно скачать можно с официального портала.https://www.cisco.com/assets/sol/sb/isa500_emulator/help/guide/ah1195632.html
Данная версия рассчитана для домашнего пользования и позволит пользователю установить дистрибутив на платформы:
- Linux Intel (ядро 2.6.x);
- Windows XP SP2 + (32-x и 64-x);
- Windows 7 (32-x и 64-x);
- Mac OS X 10.5, 10.6.x и 10.7.
Функционал Cisco VPN Client позволяет:
- обезопасить локальную сеть;
- сохранить полную анонимность в Internet и скрыть реальный IP адрес;
- подключаться к сети по защищенному каналу связи.
Remote Access VPN Business Scenarios
This chapter explains the basic tasks for configuring an IP-based, remote access Virtual Private Network (VPN) on a Cisco 7200 series router. In the remote access VPN business scenario, a remote user running VPN client software on a PC establishes a connection to the headquarters Cisco 7200 series router.
The configurations in this chapter utilize a Cisco 7200 series router. If you have a Cisco 2600 series router or a Cisco 3600 series router, your configurations will differ slightly, most notably in the port slot numbering. Please refer to your model configuration guide for detailed configuration information. Please refer to the for instructions about locating product documentation.
Note In this Guide, the term `Cisco 7200 series router’ implies that an Integrated Service Adaptor (ISA) or a VAM (VAM, VAM2, or VAM2+) is installed in the Cisco 7200 series router.
This chapter describes basic features and configurations used in a remote access VPN scenario. Some Cisco IOS security software features not described in this document can be used to increase performance and scalability of your VPN. For up-to-date Cisco IOS security software features documentation, refer to the Cisco IOS Security Configuration Guide and the Cisco IOS Security Command Reference for your Cisco IOS Release. To access these documents, see .
This chapter includes the following sections:
•
•
•
•
•
Note Throughout this chapter, there are numerous configuration examples and sample configuration outputs that include unusable IP addresses. Be sure to use your own IP addresses when configuring your Cisco 7200 series router.
Scenario Description
shows a headquarters network providing a remote user access to the corporate intranet. In this scenario, the headquarters and remote user are connected through a secure tunnel that is established over an IP infrastructure (the Internet). The remote user is able to access internal, private web pages and perform various IP-based network tasks.
Figure 4-1 Remote Access VPN Business Scenario
shows the physical elements of the scenario. The Internet provides the core interconnecting fabric between the headquarters and remote user. The headquarters is using a Cisco IOS VPN gateway (Cisco 7200 series with an Integrated Service Adaptor (ISA) or VAM, a Cisco 2600 seriesrouter or a 3600 series router), and the remote user is running VPN client software on a PC.
The tunnel is configured on the first serial interface in chassis slot 1 (serial 1/0) of the headquarters and remote office routers. Fast Ethernet interface 0/0 of the headquarters router is connected to a corporate server and Fast Ethernet interface 0/1 is connected to a web server.
Figure 4-2 Remote Access VPN Scenario Physical Elements
The configuration steps in the following sections are for the headquarters router. Comprehensive configuration examples for the headquarters router are provided in the . Table 4-1 lists the physical elements of the scenario.
Поймите, какая у вашего письма цель
Common Problems
User Cannot Log In
Problem
The message «Clientless (browser) SSL VPN access is not allowed.» appears in the browser after an unsuccessful login attempt. The AnyConnect Premium license is not installed on the ASA or it is not in use as shown by «Premium AnyConnect license is not enabled on the ASA.»
Solution
Enable the Premium AnyConnect license with these commands:
ASA(config)# webvpnASA(config-webvpn)# no anyconnect-essentials
Problem
The message «Login failed» appears in the browser after an unsuccessful login attempt. The AnyConnect license limit has been exceeded.
Solution
Look for this message in the logs:
%ASA-4-716023: Group <DfltGrpPolicy> User <cisco> IP <192.168.1.100> Session could not be established: session limit of 2 reached.
Also, verify your license limit:
ASA(config)# show version | include PremiumAnyConnect Premium Peers : 2 perpetual
Problem
The message «AnyConnect is not enabled on the VPN server» appears in the browser after an unsuccessful login attempt. Clientless VPN protocol is not enabled in the group-policy.
Solution
Look for this message in the logs:
%ASA-6-716002: Group <DfltGrpPolicy> User <cisco> IP <192.168.1.100> WebVPN session terminated: Client type not supported.
Make sure that Clientless VPN protocol is enabled for the desired group-policy:
ASA(config)# show run all group-policy | include vpn-tunnel-protocol vpn-tunnel-protocol ikev1 ikev2 l2tp-ipsec ssl-clientless
Unable to Connect More Than Three WebVPN Users to the ASA
Problem
Only three WebVPN clients can connect to the ASA. The connection for the fourth client fails.
Solution
In most cases, this issue is related to a simultaneous login setting within the group policy. Use this illustration in order to configure the desired number of simultaneous logins. In this example, the desired value is 20.
ASA(config)# group-policy Cisco attributesASA(config-group-policy)# vpn-simultaneous-logins 20
WebVPN Clients Cannot Hit Bookmarks and is Grayed Out
Problem
If these bookmarks were configured for users to sign in to the clientless VPN, but on the home screen under «Web Applications» they show up as grayed out, how can I enable these HTTP links so that the users are able to click them and go into the particular URL?
Solution
You should first make sure that the ASA can resolve the websites through DNS. Try to ping the websites by name. If the ASA cannot resolve the name, the link is grayed out. If the DNS servers are internal to your network, configure the DNS domain-lookup private interface.
Citrix Connection Through WebVPN
Problem
The error message «the ica client received a corrupt ica file.» occurs for Citrix over WebVPN.
Solution
If you use the secure gateway mode for Citrix connection through WebVPN, the ICA file can corrupt. Because the ASA is not compatible with this mode of operation, create a new ICA file in the Direct Mode (non-secure mode).
How to Avoid the Need for a Second Authentication for the Users
Problem
When you access CIFS links on the clientless WebVPN portal, you are prompted for credentials after you click the bookmark. Lightweight Directory Access Protocol (LDAP) is used in order to authenticate both the resources and the users already have entered LDAP credentials to log in to the VPN session.
Solution
You can use the auto-signon feature in this case. Under the specific group-policy being used and under its WebVPN attributes, configure this:
ASA(config)# group-policy WEBVPN_Group_Policy attributesASA(config-group-policy)# webvpnASA(config-group-webvpn)# auto-signon allow uri cifs://X.X.X.X/* auth-type all
where X.X.X.X=IP of the CIFS server and *=rest of the path to reach the share file/folder in question.
An example configuration snippet is shown here:
ASA(config)# group-policy ExamplePolicy attributesASA(config-group-policy)# webvpnASA(config-group-webvpn)# auto-signon allow urihttps://*.example.com/* auth-type all
Похожие приложения
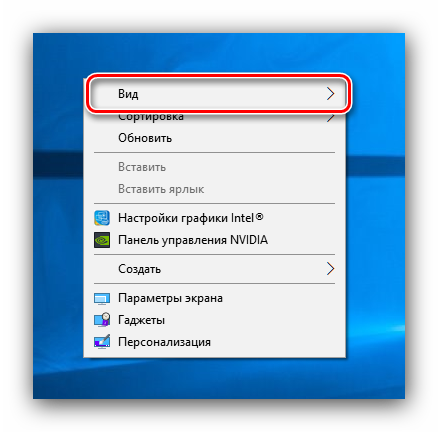
Контекстное меню
Контекстное меню появляется, когда вы, удерживая Ctrl, нажимаете левой кнопкой мыши (Mac) или правой кнопкой мыши (Win/Lin) на каком-либо элементе веб-страницы. Вид меню зависит от типа элемента (страница, текст, ссылка или картинка).
Контекстное меню страницы появляется, когда вы, удерживая Ctrl, нажимаете левой кнопкой мыши (Mac) или правой кнопкой мыши (Win/Lin) в любом месте страницы, где нет никаких ссылок, картинок или текста. В этом меню предлагаются различные варианты навигации (вернуться назад, перейти вперед или перезагрузить страницу), а также варианты сохранения страницы на Экспресс-панели или в закладках, просмотра исходного кода страницы, сохранения страницы в формате PDF и т.д.
Контекстное меню ссылки появляется, когда вы, удерживая Ctrl, нажимаете левой кнопкой мыши (Mac) или правой кнопкой мыши (Win/Lin) ссылку, и позволяет выбрать, как открыть или сохранить соответствующую страницу или адрес.
Контекстное меню изображения появляется, когда вы, удерживая Ctrl, нажимаете левой кнопкой мыши (Mac) или правой кнопкой мыши (Win/Lin) какую-либо картинку, и предлагает варианты открытия, копирования или сохранения этой картинки.
Если вы, удерживая Ctrl, нажимаете левой кнопкой мыши (Mac) или правой кнопкой мыши (Win/Lin) какое-либо изображение, с которым связана ссылка, в появившемся меню будут присутствовать пункты меню и для изображения, и для ссылки.
Настройка Cisco VPN Client и обход ошибок
Перед настройкой Cisco VPN Client, следует предупредить возникновение возможных и хорошо известных ошибок.
Переходим в реестр
-
правой клавишей мыши (далее ПКМ) кликаем на панель «Пуск» → «Выполнить»;
-
вводим без кавычек «regedit» → «OK»;
-
переходим по древу реестра «HKEY_LOCAL_MACHINE» → «SYSTEM» → «CurrentControlSet» → «Services»;
-
находим «CVirta» → переходим в правую часть окна и ПКМ кликаем на «DisplayName» → «Изменить…»;
-
полностью выделяем данные из поля «Значение:» и заменяем на «Cisco Systems VPN Adapter for 64-bit Windows» — сохраняя синтаксис без кавычек → «OK»;
Установка Cisco VPN Client для Windows 7 полностью идентична, но требует небольшой корректировки в реестре:
«Пуск» → «Выполнить» →вводим без кавычек «regedit» — система предупредит о том, что команда будет выполнена с повышенными привилегиями → «OK»;
переходим по древу реестра «HKEY_LOCAL_MACHINE» → «SYSTEM» → «CurrentControlSet» → «Control»;
в правой части кликаем ПКМ на «MaxNumFilters» → обратите внимание на цифру в поле «Значение» в десятичной системе счисления, должно быть «14», если отличается – следует изменить → в случае внесения правок жмите «OK».
Теперь непосредственно переходим к настройке Cisco VPN:
-
Запустите Cisco «VPN Client» — легко найти в панели «Пуск» → «Недавно добавленные»;
-
В окне программы выбираем пошагово как на скриншоте:
- «New»;
- в окне «VPN Client | Properties for…» → вводим в поле «Connection Entry» — имя подключения – задайте любое;
- в поле «Host» укажите домен.
- В «Group Authentication» введите:
- «Name:» имя группы;
- в «Password:» вводите пароль – желательно высокого уровня сложности;
- в «Confirm Password:» — повторите ввод пароля;
- «Save»;
в результате в основном окне программы появится вновь созданное подключение с заданным именем и указанным хостом.
Теперь запускаем:
-
кликните на имя нужного подключения → и жмите на кнопку «Connect»;
-
если все исходные данные указаны верно – подключение будет активировано.
На этом загрузка, установка и настройка Cisco VPN Client завершена.
What’s new in Cisco AnyConnect 4.8
This is a major release of the software as it includes a lot of bug fixes and new features. I’m listing down some of the features.
- Management VPN Tunnel enables the client to automatically connect to the VPN when the computer starts. This is useful for always-connected remote computers.
- TLS v1.2 is fully supported including handshaking and certificate authentication.
- NVM flow filter now monitors the filtered traffic making it easier for the admins to work on the logs.
- A lot of new cipher suites are supported for SSL/TLS connections.
If you want to go through all the features of this release, you may visit this page.
Resolved Caveats
shows the caveats that Release 5.0.07 resolves.
Table 2 Resolved Caveats
ID
Headline
CSCsi26001
unity xp-vista: reauth on rekey with saved password causes disconnect
CSCsr08760
VPN client does not handle IP option properly under Vista
CSCsr11437
IGMP packets from the Vista discovery service are getting encapsulated
CSCta07697
SetMTU needs to support Dial-Up Networking on Vista.
CSCta96341
ENH: unity client with SBL shows error message with firewall detected
CSCtb00682
VPN Client can’t connect for certain period after forcible termination
CSCtb85181
VPN Client will not connect to headend if PCF is read only
CSCtd08761
PC reboots if physical link is disrupted during a VPN connection
Verify
Use this section to confirm that your configuration works properly.
Procedure
Complete these procedures in order to confirm your configuration works properly:
-
Test your configuration with a user. Enter https://WebVPN_Gateway_IP_Address into an SSL-enabled Web browser; where WebVPN_Gateway_IP_Address is the IP address of the WebVPN service. After you accept the certificate and enter a user name and password, a screen similar to this image should appear.
-
Check the SSL VPN session. Within the SDM application, click the Monitor button, and then click VPN Status. Expand WebVPN (All Contexts), expand the appropriate context, and choose Users.
-
Check error messages. Within the SDM application, click the Monitor button, click Logging, and then click the Syslog tab.
-
View the running configuration for the device. Within the SDM application, click the Configure button, and then click Additional Tasks. Expand Configuration Management, and choose Config Editor.
Commands
Several show commands are associated with WebVPN. You can execute these commands at the command-line interface (CLI) to show statistics and other information. For detailed information about show commands, refer to .
Note: The Output Interpreter Tool (registered customers only) (OIT) supports certain show commands. Use the OIT to view an analysis of show command output.
Аналогия: каждая ЛВС как остров
Представьте, что вы живете на острове посреди огромного океана. Вокруг вас разбросаны тысячи других островов, одни из них находятся ближе другие дальше. Обычный способ перемещения — это воспользоваться переправой между вашим островом и тем островом, куда нужно попасть. Перемещение переправой означает, что у вас практически отсутствует секретность. Все что вы делаете может увидеть кто-либо другой.
Проведем следующую аналогию: каждый остров представляет частную LAN, а океан — это Интернет. Перемещение переправой аналогично подключению к веб-серверу или другому устройству через Интернет. Вы не контролируете провода и маршрутизаторы, составляющие Интернет, это подобно отсутствию контроля над другими людьми, находящимися на средстве переправы. Это оставляет вас беззащитным перед проблемами с безопасностью при попытке установить соединение между двумя частными сетями, используя общий ресурс.
Ваш остров решает навести мост с другим островом, чтобы появился более легкий, безопасный и прямой путь для перемещения людей между островами. Наведение и содержание моста — дорогостоящая процедура, даже если эти острова находятся на очень близком расстоянии один от другого. Однако потребность в надежном и безопасном пути настолько велика, что вы решаетесь на этот шаг. Ваш остров хотел бы соединиться со вторым островом, который находится гораздо дальше первого, но вы решаете, что это слишком дорого.
Возникновение такой ситуации очень вероятно при использовании выделенной линии. Мосты (выделенные линии) отделены от океана (Интернет) и при этом они способны соединять острова (LAN). Многие компании выбрали этот путь из-за потребности в безопасной и надежной связи между своими удаленными офисами. Однако, если офисы находятся на очень большом расстоянии один от другого, стоимость может оказаться чрезмерно высокой — это подобно ситуации, когда нужно возводить очень длинный мост.
Какое место VPN занимает в этой аналогии? Каждому обитателю таких островов можно предоставить свою собственную небольшую подводную лодку, обладающую следующими свойствами.
-
Быстрота.
-
Легкое управление в нужном направлении.
-
Полная невидимость для остальных средств переправы и подводных лодок.
-
Надежность.
-
После приобретения первой подводной лодки, стоимость приобретения дополнительных субмарин становится небольшой.
Хотя они плавают в океане вместе с остальными лодками, обитатели двух островов могут перемещаться туда и обратно в любое время, сохраняя секретность и безопасность. Именно в этом и заключается сущность функционирования VPN. Каждый удаленный пользователь вашей сети может взаимодействовать безопасным и надежным способом, используя Интернет в качестве среды для подключения к частной LAN. VPN гораздо легче расширяется добавлением новых пользователей и различных расположений чем выделенная линия. На самом деле, масштабируемость — это основное преимущество VPN в сравнении с типичными выделенными линиями. В отличие от выделенных линий, где стоимость возрастает прямо пропорционально протяженности соединения, географическое расположение каждого офиса имеет меньшее значение при создании VPN.
System Requirements
Refer to Chapter 2, «Installing the VPN Client,» in the Cisco VPN Client User Guide for Mac OS X for a complete list of system requirements and installation instructions.
•To install the VPN Client on any system, you need
–CD-ROM drive (if you are installing from CD-ROM)
–Administrator privileges
•The following table shows the supported platforms.
|
Computer |
Operating System |
Requirements |
|---|---|---|
|
Computer with a Pentium-class processor or greater, including TabletPC 2004/2005 |
The 4.9.00.0050 VPN Client for Mac OS X is the first version to support the Intel processor for Mac OS X. This VPN Client release for Mac OS X supports only OS X 10.4 and 10.5 on both PPC and Intel processors. This version does not support Mac OS X earlier and later releases. |
•50 MB hard disk space. •PPC or Intel processor. |
|
Macintosh computer |
Mac OS X, Version 10.4 or 10.5 |
The VPN Client supports the following Cisco VPN devices:
•Cisco VPN 3000 Series Concentrator, Version 3.0 and later. Using IPsec over TCP requires VPN 3000 Series Concentrator version 3.6.7.a and later.
•Cisco PIX Firewall, Version 6.2.2(122) or Version 6.3(1).
•Cisco IOS Routers, Version 12.2(8)T and later
VPN Client does not support the establishment of a VPN connection over a tethered link.
If you are using Internet Explorer, use version 5.0, Service Pack 2 or higher.
Предварительные условия
Требования
Перед проведением настройки убедитесь, что выполняются следующие условия:
-
Соединению по протоколу IPsec назначен пул адресов;
-
Для клиентов VPN группа с названием 3000clients обладает предварительно распространенным ключом коллективного пользования cisco123;
-
Для клиентов VPN аутентификация групп и пользователей осуществляется на маршрутизаторе локально;
-
Для туннеля между локальными сетями используется параметр no-xauth для команды ISAKMP key.
Используемые компоненты
Сведения, содержащиеся в данном документе, касаются следующих версий программного и аппаратного обеспечения:
-
Маршрутизатор под управлением операционной системы Cisco IOS Release 12.2(8)T;
Примечание. Сведения, содержащиеся в данном документе, были недавно проверены для операционной системы Cisco IOS Release 12.3(1). В связи с этим никаких изменений вносить не требуется.
-
Cisco VPN Client для Windows версии 4.х (любая программа VPN Client версии 3.x и выше).
Данные для документа были получены в специально созданных лабораторных условиях. При написании данного документа использовались только устройства с пустой (стандартной) конфигурацией. В рабочей сети необходимо изучить потенциальное воздействие на сеть всех команд.
Ниже приведены результаты выполнения команды show version на маршрутизаторе.
Условные обозначения
Дополнительные сведения об условных обозначениях см. в документе «Технические рекомендации Cisco. Условные обозначения».
Параметры настройки
Самое главное, что необходимо осуществить в первую очередь — это скорректировать зону видимости прибора движения. В современных моделях они выделены специальными элементами.


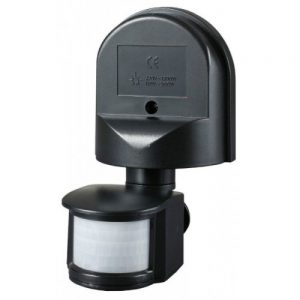


Проводя настройку данного параметра, стоит направить угол установки так, чтобы лучи были попадали на зону обнаружения.

Настроить чувствительность датчика можно с помощью специального регулятора он находится на корпусе и оформлен в виде панели от минимального до максимального значения.

Настройка данного параметра является наиболее сложной, поскольку детектор должен будет срабатывать только на движения человека.


Далее следует настройка порога освещенности, он позволяет срабатывать прожектору после наступления темноты. Во-первых, нужно установить параметр на максимальное значение, а затем с наступлением темноты отрегулировать период срабатывания датчика.

Последний показатель задержка времени, настраивается очень просто. Диапазон времени от 5 сек. до 10 мин. Настройка этого параметра зависит от ваших предпочтений, при настройке параметры лучше начинать с минимальной отметки, для более быстрой проверки параметров.


Настроить датчики движения своими руками достаточно просто, следует лишь проявить немного терпения и последовательности.